Setting up an ETH2 Validator on testnet

Before you follow this guide, IMO dappnode is a much better way to go. Here’s a guide on that. https://theethernaut.substack.com/p/running-an-eth-2-validator

HOWTO setup a Prysm, Ethereum 2.0 client on the Topaz testnet using Docker on existing hardware.

Prerequisites

  • Docker 19.x
  • 32 GöETH (testnet ETH of no value)
  • Metamask connected to Görli

If you’re on Windows, wherever you see $HOME, replace with a path to the location you would like to store the testnet files, for example instead of $HOME/.eth2:/data use c:/prysm/eth2:/data

Guide

  1. Install Docker 19.x following this guide Install Docker Engine | Docker Documentation

Add your user to the docker usergroup

sudo adduser $USER docker

Re-login for new permissions to take effect.

  1. Download the required Docker images. The Beacon Chain is the Ethereum 2.0 testnet, ‘Topaz’. Think of the validator as the miner that validates PoS blocks on ETH2 instead of mining them on ETH1.x, each validator is a worker or a rig.
docker pull gcr.io/prysmaticlabs/prysm/validator:latest
docker pull gcr.io/prysmaticlabs/prysm/beacon-chain:latest
  1. On your firewall, open up ports tcp/13000 and udp/12000.

  2. Start the Docker container for the beacon chain.

docker run -d --rm -v $HOME/.eth2:/data -p 4000:4000 -p 13000:13000 -p 12000:12000/udp --name beacon-node gcr.io/prysmaticlabs/prysm/beacon-chain:latest --datadir=/data --p2p-host-ip=$(curl -s ident.me)

If you didn’t open the ports in step #3 you can skip —p2p-host-ip=$(curl -s ident.me), You can also enter your IP address instead of having bash look it up —p2p-host-ip=<my public ip> if you do not have curl installed or if you’re on Windows

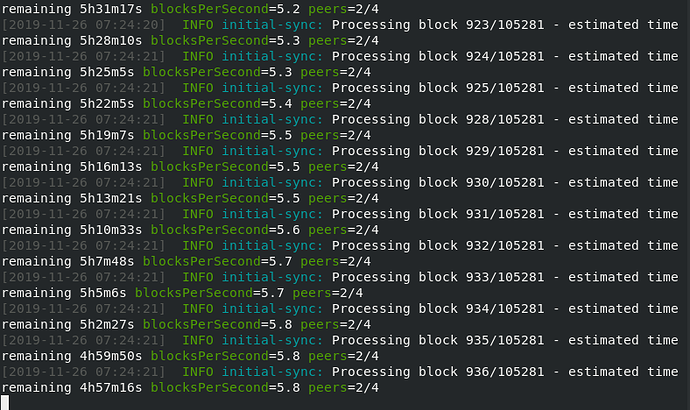
  1. You can watch the beacon chain download in the Docker logs. You need to wait for the chain to download before continuing.
docker logs -f beacon-node

The -f flag ‘follows’ the log, ctrl+c to stop following the log, this doesn’t stop the container. You can also run the logs command without the -f to see a snapshot without following.


If you need stop the node at any point

docker stop beacon-node

Start it back up again with the command in step 3.

  1. You are now running Ethereum 2.0, Phase 0. Next we setup a validator, you can setup one or many, each validator requires a 32 ETH stake deposited to a validator deposit contract before the validator can be activated.
    Go to Prylabs, skip step 1, in step 2 be sure to switch Metamask to Görli before connecting, if you do not have 32 GöETH in your wallet, you will be given the option to receive it from Prysm’s faucet.

  2. Generate a validator keypair, as well as deposit data to submit on the Prylabs page.

docker run -it -v $HOME/.eth2:/data \
gcr.io/prysmaticlabs/prysm/validator:latest \
accounts create --keystore-path=/data --password=changeme

This command will output a Raw Transaction Data block:

  1. Copy and paste the deposit data into the field in step 3 Prylabs

  2. The beacon node must be completely synced before attempting to initialize a validator client, otherwise the validator will not be able to complete the deposit and funds will be lost.

  3. Start a validator client.

docker run -d --rm -v $HOME/.eth2:/data --network="host gcr.io/prysmaticlabs/prysm/validator:latest --beacon-rpc-provider=127.0.0.1:4000 --keystore-path=/data --password=changeme

If you need stop the node at any point

docker stop validator

Start it back up again with the command in step 3.

  1. Once both the beacon node and validator client are running, make your deposit by clicking the button in step 5 on Prylabs and following the steps presented in your wallet.
Sources used to create this guide

5 Likes

This seems really interesting but also very intimidating and almost looks like a foreign language to me :slight_smile:

2 Likes

Take it one step at a time, ask questions.

2 Likes

Okay my first question is what is a Docker?

2 Likes

It allows you to run software inside of a container, like a VM but without having to have an entire o/s. Running inside a docker container saves the trouble of having to install and configure all of the dependencies (software that the node requires to run), because the container image has it all setup already.

Container are also ephemeral (temporary), you stop them and the entire thing is gone forever, making it a very clean way to run software and easy to start from scratch. In fact, you start from scratch each time you restart a container.

In this setup we use docker volumes to save the chain data in a folder on the host machine, so that part isn’t lost when you restart.

Dont worry about not knowing much about docker, just know that it’s the container that runs your application.

2 Likes

that was easy to understand thank bro!

4 Likes

Another guide for an easy install on dedicated hardware.

2 Likes

I’m having an issue with step 10.
Everything went smooth but the creation of the validation client is returning the following:
docker: invalid reference format.
See 'docker run --help'.

Using Ubuntu 18.04 on an Alienware.

2 Likes

What should I be seeing after I run the command in step 3? It is giving me a single string of characters then waiting for the next command. When I run the logs command, I receive “Error: No such container: beacon-node”

2 Likes

I have a basic doubt on master node ! How these bring passive income ?:thinking:

1 Like

Hey @AbodyRulez ,

Sorry for the late reply. The forum changed my double dash into a long dash, I have corrected it.

2 Likes

This does not bring income until it goes live on mainnet.

1 Like

Step 3 is opening ports on your firewall, unless you mean step 8 which is item #3 on the Prylabs website.

If you are trying to view the logs of the beacon node, it needs to be running per step 4. The error you have received means that the container isn’t running. You can see what containers are running with the command docker ps

1 Like

Will we be rewarded with anything for being a validator using the goerli-eth?

Will being a testnet validator with little to no penalties make our validator node ready for the mainnet?

When on mainnet will we need the 32 ETH to make any staking rewards or will just running the validator node be enough to earn some ETH?

Thanks!

1 Like

You’ll earn testnet eth on the testnet, has no value, never will have any value.

When (if ever) mainnet comes, you’ll need real eth, you cannot earn them on testnet.

1 Like

I am stuck at step 10. When I run this command (In a Ubuntu terminal):

docker run -d --rm -v $HOME/.eth2:/data --network=“host” \
gcr.io/prysmaticlabs/prysm/validator:latest \
--beacon-rpc-provider=127.0.0.1:4000 \
--keystore-path=/data \
--password=changeme

I get the following error: docker: Error response from daemon: network “host” not found.
How can I solve this error?

1 Like

I think it may be the quotes around host, try typing instead of copy/pasting.

2 Likes

Thanks for the write up @greer !! I was able to get this up and running with Docker running on Windows 10 Pro. Validator has been up for about 5 hours now. Estimating about 3 more hours for my deposit inclusion.

3 Likes

Docker install and config on my system was not working well. Switched over to the prysm.bat configuration for Windows 10. This new setup is working much better and was much easier to get up and running.

https://kb.beaconcha.in/tutorial-eth2-multiclient/prysm-client/windows-prysm/script-beaconnode-and-validator

3 Likes

we just switched careers and are learning copy/paste is not always your friend!

2 Likes